Networking RJ45 RJ11 Tester with Crimper and 100 x RJ45 Ends Tool Kit - kenable
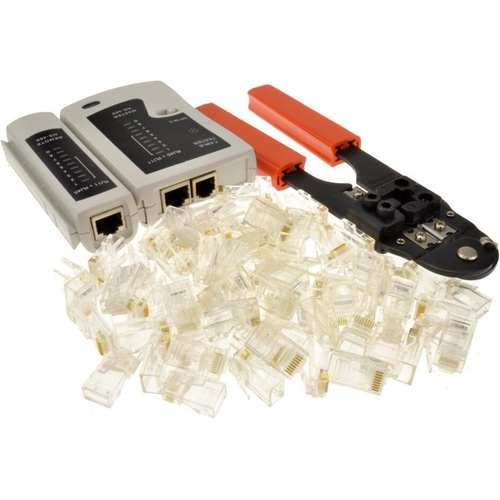
This comprehensive tool kit includes a networking RJ45 RJ11 tester, a crimper tool, and 100 x RJ45...This comprehensive tool kit includes a networking RJ45 RJ11 tester, a crimper tool, and 100 x RJ45 connectors, perfect for creating custom length network cables. The kit enables you to easily create your own Cat5, Cat5e, Cat6, or RJ45 cables. The reliable RJ45 or RJ11 tester is user-friendly, quickly identifying any connection issues. The crimper tool efficiently strips cable to the correct length, ensuring a perfect fit for the RJ45 crimp ends. It can strip both flat and round cables, making it a versatile addition to your toolkit.
This kenable tool kit is designed for network technicians, IT professionals, and DIY enthusiasts who need to create and test custom network cables. Its key benefit is enabling the easy creation and verification of Cat5, Cat5e, Cat6, or RJ45 network connections, saving time and reducing troubleshooting. A minor caveat is the learning curve for perfect crimping on the first try. The kit includes a versatile crimper, a reliable tester, and a generous supply of connectors.
All features
Brand
kenable
Extended Product Information
FAQs
What types of network cables can I create with this kit?
This kit is designed for creating Cat5, Cat5e, Cat6, and standard RJ45 network cables.
Does the tester require batteries?
Yes, the RJ45/RJ11 tester typically requires batteries (e.g., 9V), which are not included with the kit.
Can the crimper tool strip different types of cables?
Yes, the crimper tool is designed to strip both flat and round cables efficiently.
How many RJ45 connectors are included?
The kit includes 100 RJ45 connectors.
What is the primary function of the RJ45/RJ11 tester?
The tester quickly identifies connection issues, ensuring proper continuity and correct pinout for RJ45 (network) and RJ11 (telephone) cables.
Is this kit suitable for professional network installations?
Yes, it is suitable for creating custom cables and performing on-site testing for professional installations. For very high-volume production, dedicated industrial tools might be preferred.
Troubleshooting
Tester lights do not illuminate
Ensure batteries are correctly installed and are not depleted. Check battery contacts for corrosion.
Crimper not properly seating RJ45 connector
Ensure the RJ45 connector is fully inserted into the crimper die. Check that the connector is aligned correctly with the cable wires.
Network cable shows no connection after testing
Verify wire order (T568A/T568B) and ensure all wires are properly seated in the RJ45 connector. Re-crimp the connection if necessary. Test individual wires with the tester.
Tester indicates a short or crossed connection
This usually means wires are out of order or not making proper contact. Re-strip and re-crimp the connector, carefully following the wiring diagram.
Pros and Cons
Pros
Comprehensive kit for creating and testing network cables.
User-friendly tester for quick issue identification.
Crimper handles both flat and round cables.
Includes a large quantity of RJ45 connectors.
Cost-effective solution for custom cable needs.
Cons
Requires some practice to achieve perfect crimps.
Tester battery not included.
May not be suitable for industrial-level, high-volume production.
Setup, Compatibility & Care
Setup:
Insert batteries (not included) into the RJ45/RJ11 tester.
Prepare your network cable by cutting it to the desired length.
Use the crimper tool to strip the outer jacket of the cable to expose the inner wires.
Arrange the wires according to the T568A or T568B standard.
Insert the wires into an RJ45 connector and use the crimper tool to secure the connection.
Test the newly created cable using the integrated tester.
Compatibility:
Cable Types: Compatible with Cat5, Cat5e, Cat6, and standard network cables.
Connectors: Primarily for RJ45 connectors, and the tester also supports RJ11 connectors for telephone lines.
Care:
Keep the tools clean and dry. Wipe with a soft, dry cloth.
Avoid exposing the tester to moisture.
Store all components in a safe place to prevent damage or loss.

 eBay£15.63Visit shop
  B&Q£15.99Visit shop